29/9/2022
What is the Purpose of An Equatorial Mount
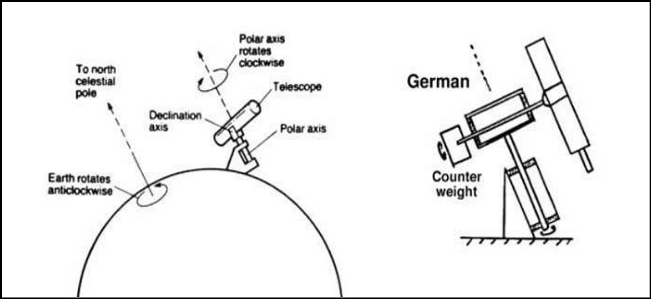
Equatorial mounts have the purpose of aligning a viewing device, whether that be a telescope or a camera with the movement of the stars and hence have something constantly in frame. This is done by simply rotating a device at the same speed but opposite direction as the spin of the Earth hence almost entirely countering the effect of the Earth's rotation. The rotation of Earth makes capturing long exposure images of the stars difficult whenever exceeding the 500 rule which astrophotographers use for untracked images, images taken without a mount that counters the Earth's rotation. Obviously, there are inherent flaws with this method as we, the observers as still physically changing position, whether that is stars, nebula, galaxies or planets the effect caused by the change in position would theoretically vary. This is a negligible effect relative to the distance of the subject. The error caused by it, parallax error, is essentially non-existent.
Why DIY
Astrophotography equipment is known for being famously expensive, making it difficult for a beginner who is unwilling to spend large amounts of money on fancy equipment to take nice shots. By Doing It Yourself it can be made extremely cheap, with specific functionality which could be expected of expensive units and achieve similar results.
What Can it Do?
I have made mine such that it can be connected to a car battery and run on the battery for an extremely long period of time and in theory is capable of supporting significantly larger lenses than my longest focal length lens. Although it is made of plastic is has a large amount of play likely impacting the real limit, although it is still capable of driving my main lens. It is also capable of remotely capturing long exposure images and acting as an intervalometer, as the system is driven by an ESP8266, a small micro-computer with WiFi and Bluetooth.
Materials
- ESP8266
- NEMA 8 12V Stepper Motor
- A4988 Stepper Motor Driver
- 12V Car Socket USB Charger
- Capacitor
- Some Way of Attaching it all
- 608 Bearings
- 8mm ⌀ rod
How I made It
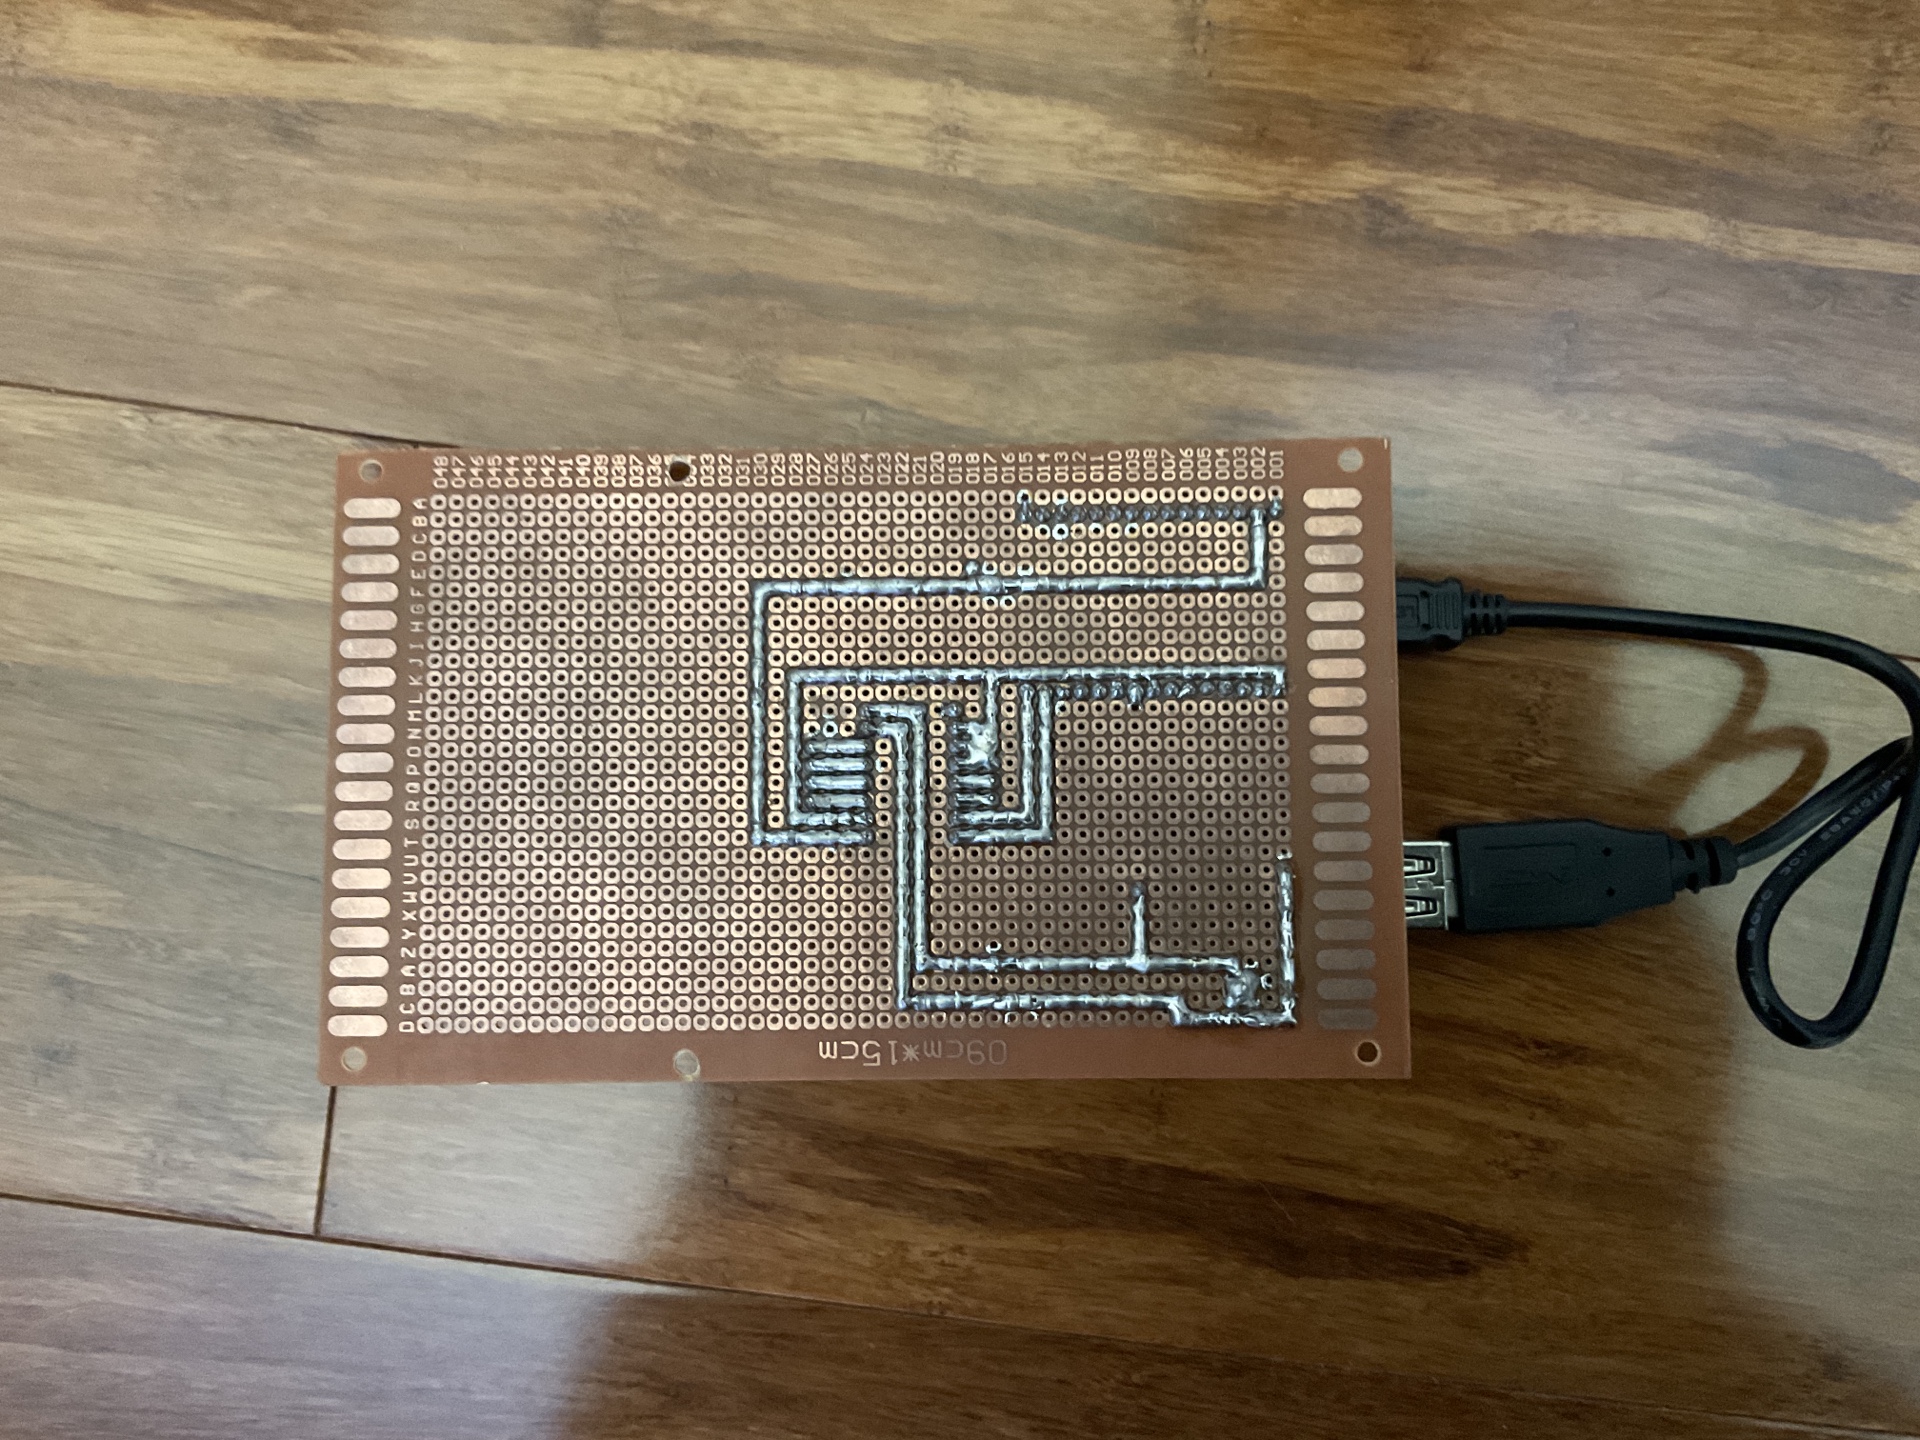
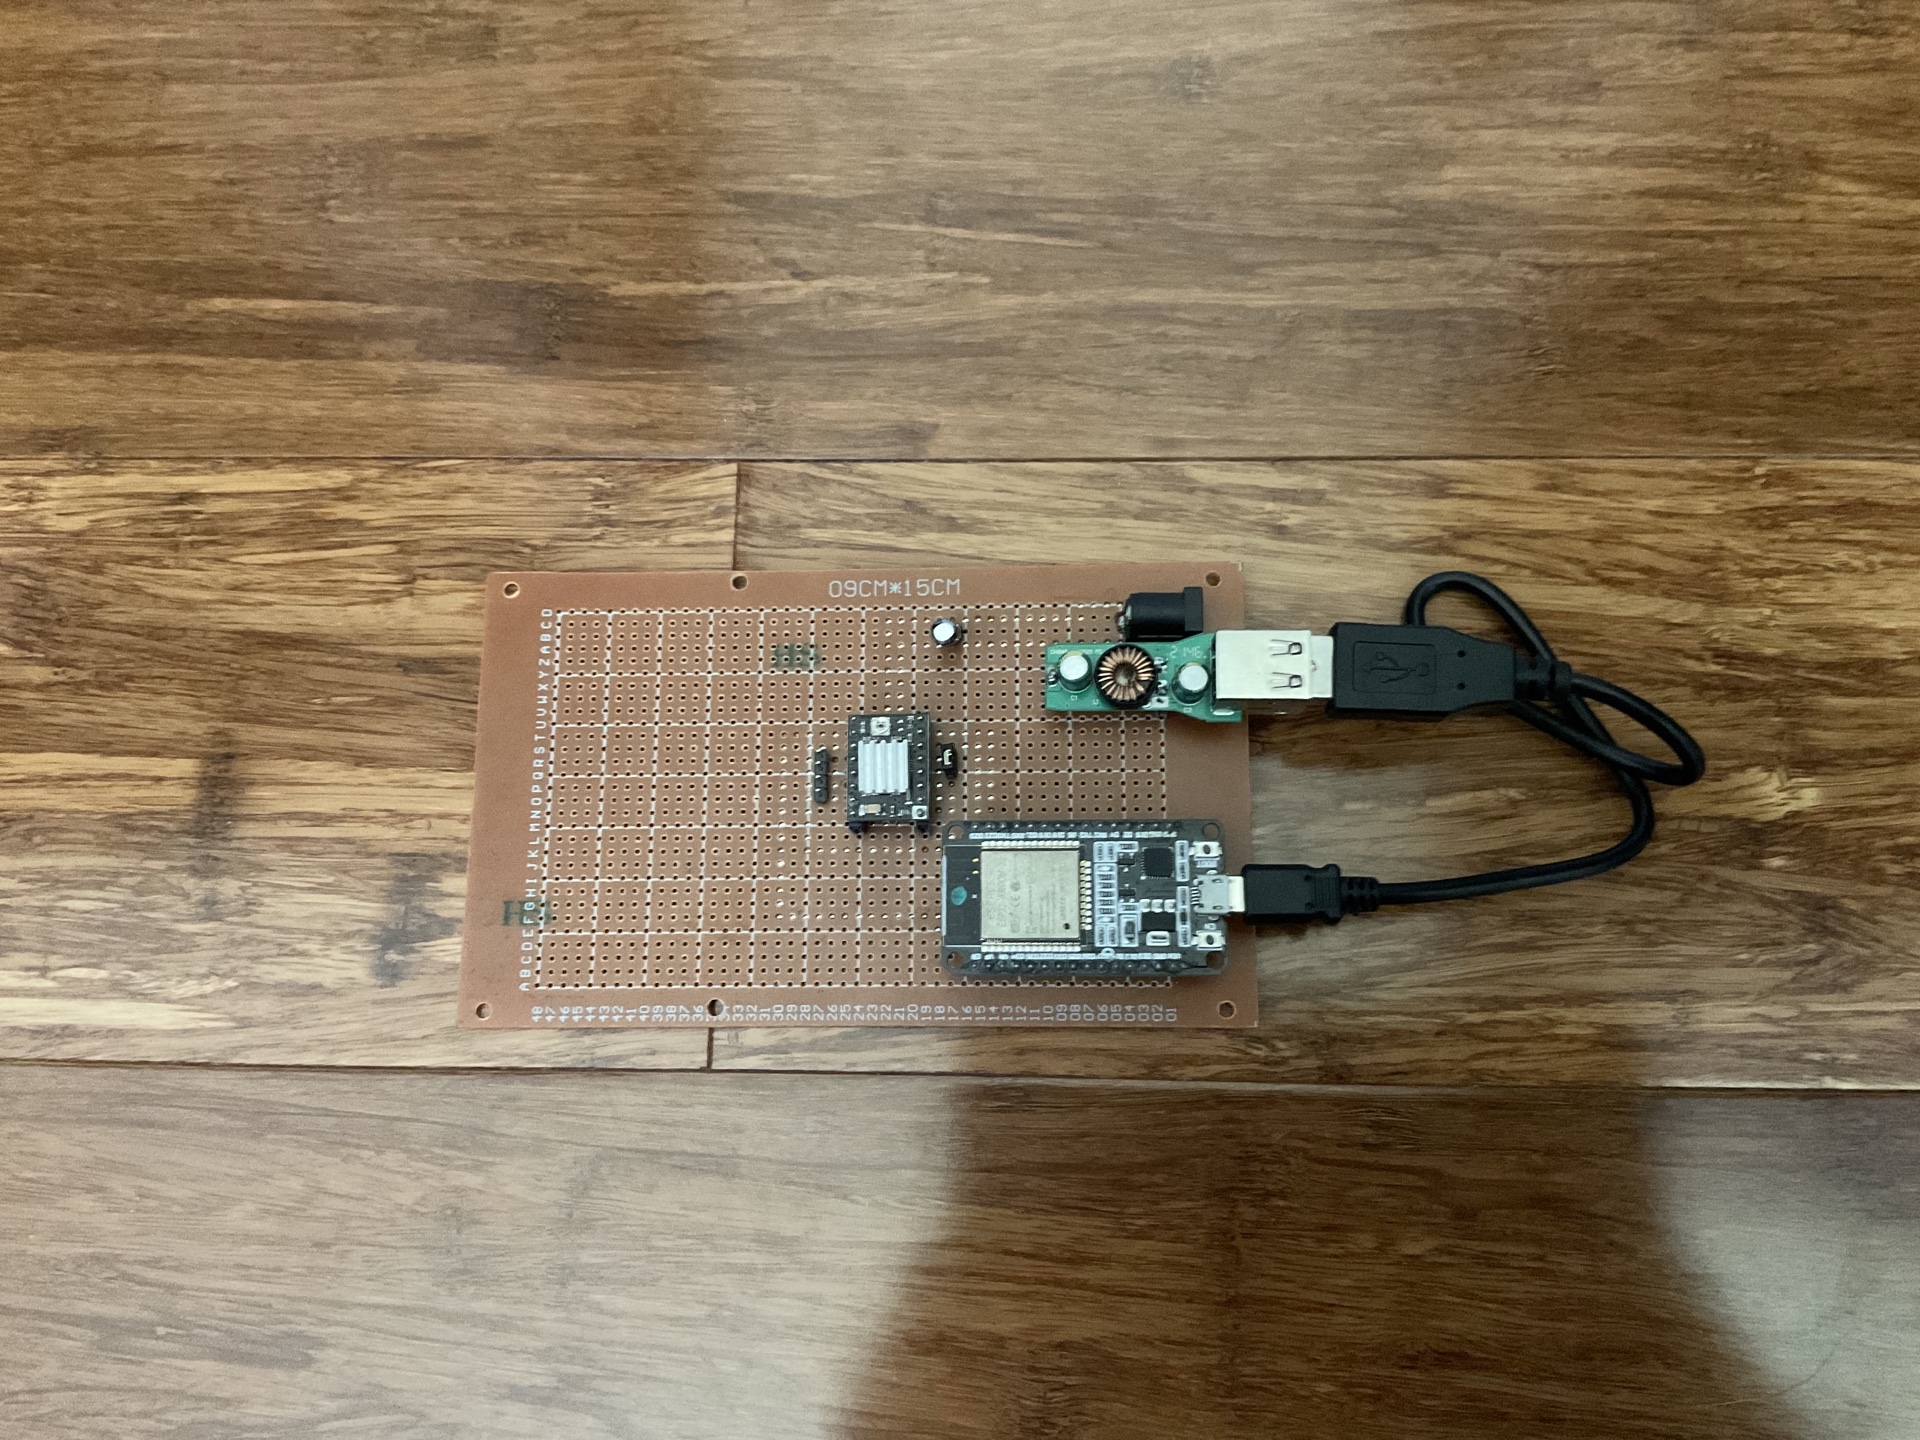
I first disassembled the 12V Car socket charger. Then I soldered all the components on a prototyping board where I had mapped the position of all the components and the wiring between them, leaving space for upgrades. As per the images below.
And using a 3D printer and files created by SirFixalotFPV who remixed the original files to fit a NEMA stepper motor. Equipped with instruction from instrubtables I created it.